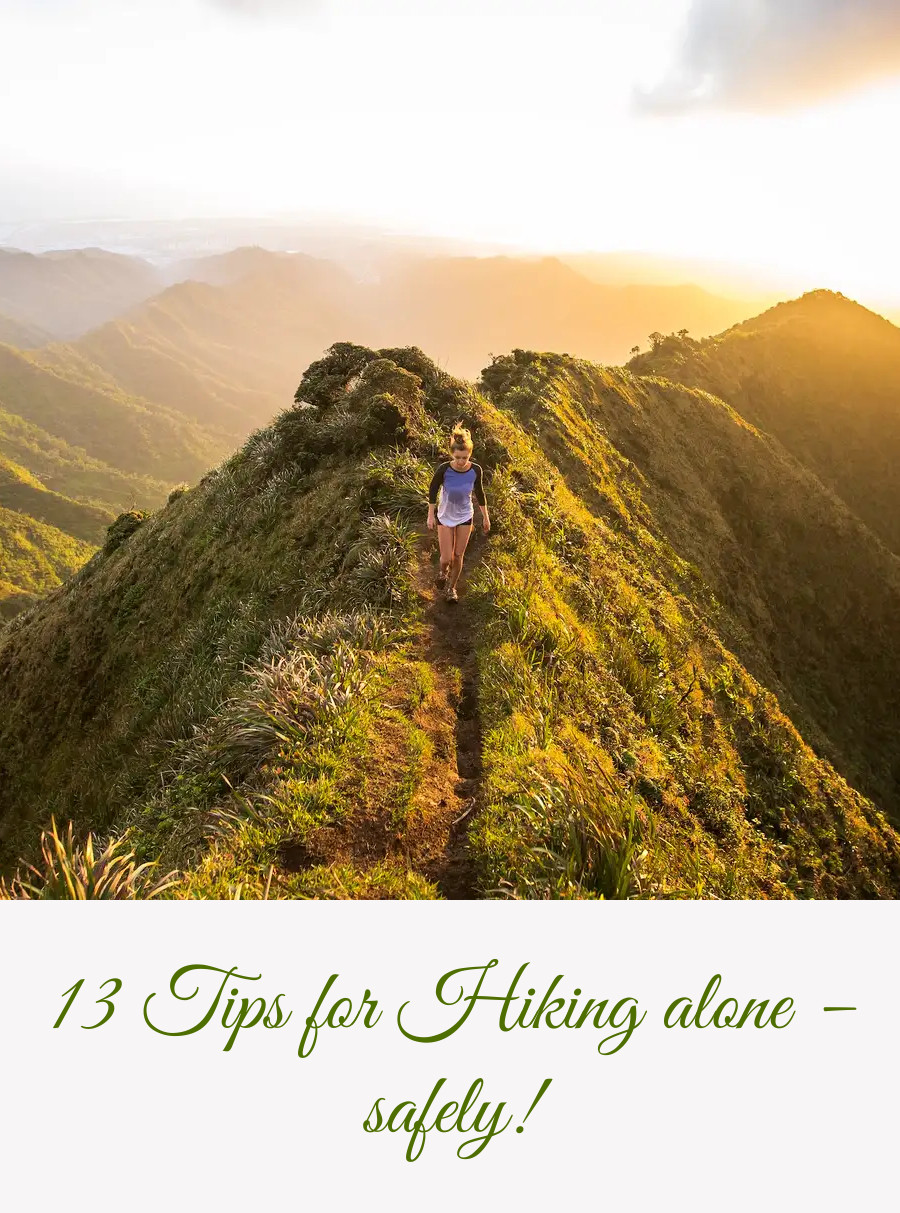
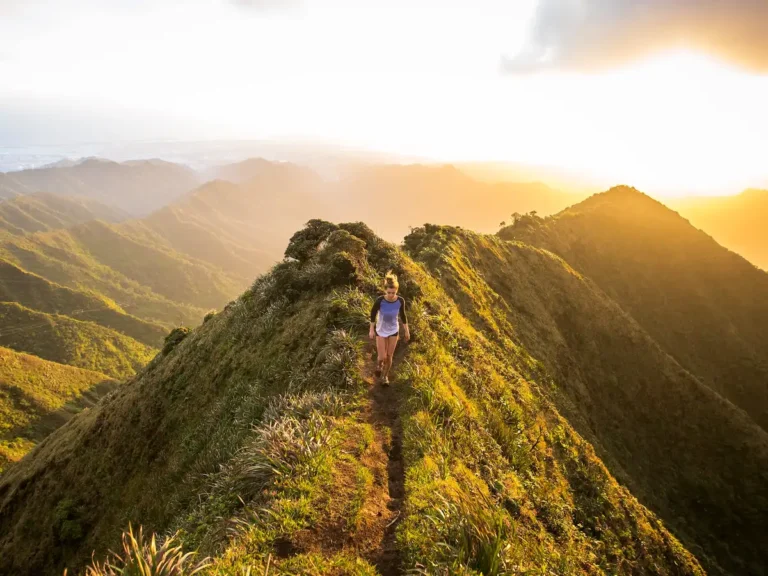
13 Tips for Hiking alone – safely!
This post may contain affiliate links. This means that we may receive a small commission from purchases through those links. Read more in our affiliate disclosure.
There’s a moment in every solo hike when you realize you’re completely on your own. It’s thrilling but can be daunting. In this post, we’ll cover the strategies that turn this anxiety into a sense of empowerment.
To stay safe when hiking alone, opt for familiar, well-traveled trails, particularly when you’re just starting out. Inform someone about your plans, including the trail and expected return time. Always carry the 10 essentials, which include items for safety and survival like water, extra food, navigation tools, a first-aid kit, and an emergency shelter. Check the weather forecast to prepare for sudden changes in conditions. Make sure you have a communication plan for the case something goes wrong, carrying a charged cell phone and possibly a Personal Locator Beacon or satellite messenger for remote hikes. Start with shorter, less challenging hikes, progressively tackling more demanding trails as you gain experience—each hike offers new learning opportunities!
- Introduction
- Why I Love Hiking Alone
- How to hike solo safely
- 1. Choose a Trail Within Your Limits
- 2. Choose a Well-Travelled Trail
- 3. Tell Someone Your Plans
- 4. Carry the 10 Essentials
- 5. Check the Weather Forecast
- 6. Inform Yourself About the Local Wildlife
- 7. Stay Aware of Your Surroundings
- 9. Stay On Trail
- 10. Avoid Creeps
- 11. Make Sure You Can Communicate with the Outside World
- 12. Start Small and Progress from There
- 13. Keep Learning
Why I Love Hiking Alone
Hiking, to me, is more than just a physical activity—it’s a journey of self-discovery, a path to inner peace, and a way to connect deeply with nature. One of my favorite ways to hike is alone. It might sound a bit daunting to some, but hear me out. There’s a special kind of magic in solo hiking, a sense of freedom and independence that’s hard to match.
When I’m out there on the trail, just me and the vast expanse of nature, I find a rare opportunity to introspect, to think without interruptions, and to simply be with my own thoughts. It’s almost meditative, the rhythmic pattern of my footsteps blending with the natural sounds around me, creating a harmonious symphony that’s both calming and invigorating.
Solo hiking also pushes me out of my comfort zone. It challenges me to be completely self-reliant, to trust my instincts, and to solve problems on my own. There’s a unique sense of achievement in navigating a difficult trail or setting up camp by myself. These experiences have not only enhanced my hiking skills but have also spilled over into my everyday life, making me more confident and resilient.
And let’s not forget the freedom! I love being able to set my own pace, choose my own path, and stop whenever I want to soak in the view or take a break. There’s no need to coordinate with others or compromise on the route. It’s just me, making decisions based on what feels right at the moment.
How to hike solo safely
Of course, hiking alone comes with its own set of challenges and safety concerns, in addition to the precautions every hiker should take to stay safe. which I’ve learned to navigate through experience. In the following, I’ll share some tips that have helped me enjoy solo hiking safely and confidently. I hope these tips will inspire you to try solo hiking and experience the incredible benefits it offers.
1. Choose a Trail Within Your Limits
Embarking on your first solo hike? Fantastic! But let’s chat about the golden rule: picking a trail that’s right for you. It’s tempting to dive headfirst into the most challenging trails, seeking that thrill and sense of accomplishment. And trust me, as someone who loves pushing her boundaries, I totally get it. But when you’re hiking solo, you need to balance that adventurous spirit with a healthy dose of realism.
Assess your skill level honestly. Are you a seasoned hiker used to long, strenuous trails? Or are you still getting your hiking legs, building up your endurance and experience? Choose a trail that matches your current abilities. This doesn’t mean you can’t challenge yourself, but it’s important to do so within a safe and reasonable framework.
One strategy I often use is to have a “short-cutted” hike in mind. This means I pick a trail where I can push myself, but I also plan an easier alternative route, or a turnaround point, that I know I can handle comfortably. It’s like having a safety net – if I’m not feeling up to the challenge on that particular day, I can switch to my backup plan without feeling like I’ve missed out.
When you’re hiking alone, you’re the only one responsible for making decisions. There’s no shame in taking the easier route if that’s what the situation calls for. In fact, it’s a smart move. Hiking within your limits not only ensures your safety but also allows you to enjoy the experience more fully, without the constant worry of biting off more than you can chew.
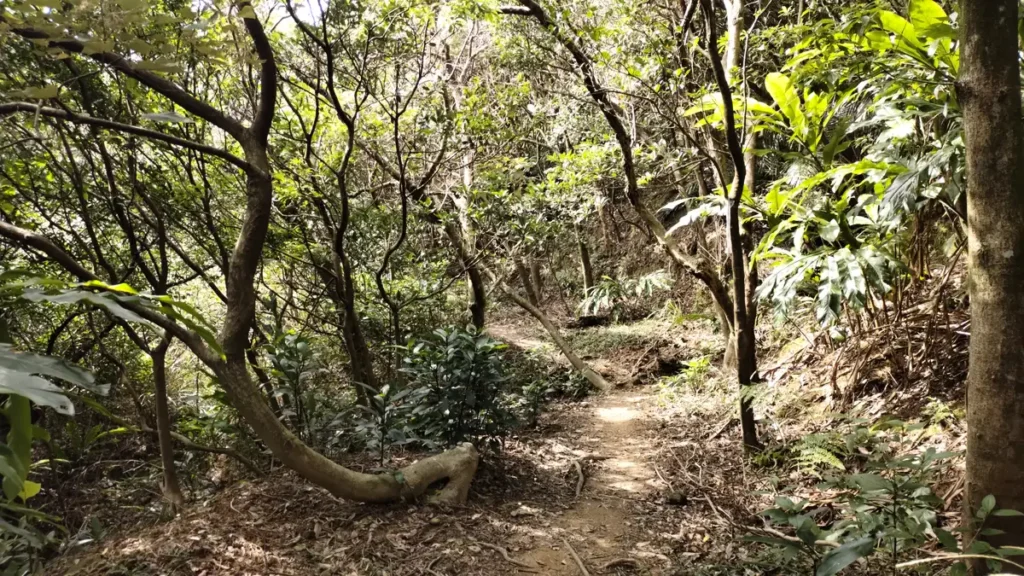
2. Choose a Well-Travelled Trail
When you’re hitting the trails solo, especially as a beginner, here’s my tip: opt for well-travelled trails. Now, I’m not saying you should only walk the most popular paths, crowded with hikers at every turn. However, there’s a comforting middle ground between the beaten path and the road less travelled.
Well-travelled trails offer several advantages, especially for solo hikers. For starters, they are usually well-marked, reducing the risk of getting lost. There’s something reassuring about seeing those trail markers, knowing you’re on the right path—it’s like the trail is giving you a little nod of encouragement.
Additionally, these trails often have more frequent foot traffic, meaning you’re more likely to encounter other hikers. This can be a huge plus in case you need assistance, whether it’s directions, advice, or help in an emergency. And let’s not forget, meeting fellow hikers is part of the fun! I’ve had wonderful encounters and made lasting friendships on these trails. There’s a unique camaraderie among hikers that you just don’t find anywhere else.
However, don’t misunderstand me. I’m not suggesting you should avoid remote trails altogether. There’s a unique thrill in traversing less frequented paths, discovering unspoiled nature, and enjoying solitude. But while you’re still building your confidence and skills, well-travelled trails are a safer bet.
Lastly, “well-travelled” doesn’t necessarily mean “easy.” There are plenty of challenging trails out there that are also popular and well-marked. So, you can still find an adventure suitable for your skill level while ensuring a safer solo hiking experience.
3. Tell Someone Your Plans
One of the most crucial steps in preparing for a solo hike, and honestly, one I can’t stress enough, is to tell someone you trust about your plans. It’s a simple act, but it can make a world of difference in case of an unexpected situation.
Before I set off on any solo adventure, I always make sure to inform a friend or family member about where I’m going and what my plans are. This includes the trail I’ll be on, the expected duration of the hike, and any other significant details.
Be specific! Don’t just say, “I’m going hiking in the Rockies.” Mention the specific trail, your expected start and finish times, and any side trips you might take. The more details you provide, the easier it will be for rescuers to locate you if need be.
In the event that something goes wrong—say I sprain an ankle, get lost, or encounter any other kind of trouble—it’s comforting to know that someone out there is aware of my whereabouts and can raise the alarm if I don’t check in as expected.
And here’s a little tip from my own experience: I also leave a note in my car at the trailhead with the same information. It’s an additional safety measure that could prove invaluable in an emergency.
However—there’s an important caveat: Don’t use your social media for this. Nobody in particular is going to feel responsible to ensure your safe returns, and if you’re alone in the middle of nowhere—especially as a woman—you don’t want to inform potential stalkers of your whereabouts.
4. Carry the 10 Essentials
Now, let’s talk gear. When you’re out there on the trail alone, being self-reliant isn’t just a cool phrase—it’s your lifeline. That’s where the “10 Essentials” come into play: These are the items you should have with you on every hike, especially when you’re flying solo. Trust me, they can make the difference between an uncomfortable situation and a dangerous one.
Here’s the rundown of the 10 Essentials:
- Navigation: This includes a map and compass, or a GPS device. I always carry a physical map and compass as a backup, even if I rely on my phone GPS and map app. Electronics can fail, but old-school navigation rarely does.
- Sun Protection: Sunscreen, sunglasses, and a hat or buff. Even on cloudy days, UV rays can be strong, especially at higher elevations.
- Insulation: Extra clothing layers are a must. The weather can change rapidly in many hiking areas, so it’s important to be prepared. I usually pack a lightweight, waterproof jacket and an extra layer like a fleece, even in the summer (getting cold after nightfall is no fun).
- Illumination: A headlamp or flashlight, with extra batteries (or a matching USB cable and a power bank, if you have a chargeable one). This is not just important for night hiking but also in case you get delayed and find yourself out after dark.
- First-Aid Supplies: A basic first-aid kit should include items like bandages, antiseptic wipes, blister treatment, and any personal medications. I’ve learned from experience that it’s also wise to know how to use everything in your kit.
- Fire: Waterproof matches, a lighter, or a fire starter can be a lifesaver in an emergency situation, especially in cold or wet conditions.
- Repair Kit and Tools: A multi-tool or knife, plus some duct tape can go a long way in fixing gear or making emergency repairs.
- Nutrition: Extra food is essential. I always pack at least an extra day’s worth of food, just in case. High-energy, non-perishable items are your best bet. I like to pack a baggie of nuts or trail mix!
- Hydration: Extra water and a way to purify water. I carry a life straw and purification tablets as a backup.
- Emergency Shelter: A tent, space blanket, bivy sack, or tarp can provide critical shelter if you’re stranded or injured. Or if you’re feeling fancy, a hammock camping setup – which can double as a comfy place to take an afternoon nap.
Carrying these essentials might seem overkill, especially if you’re just planning a short day hike. But the truth is, you never know what might happen out there. And if something does happen, being able to brave it with your preparedness feels incredibly empowering 😉
In my early days of hiking, I often skimped on some of these items to save weight—especially on familiar trails. But after a few unexpected situations (like the time I got caught in a sudden storm in the Sierras), I’ve learned my lesson. Now, no matter how light I pack, these 10 essentials are always with me. They don’t take up much space, and the added confidence they bring is absolutely worth it.
5. Check the Weather Forecast
Before setting out on any hike, you need to know what Mother Nature might have in store.
Weather in the outdoors can change rapidly and can be drastically different from what you experience in your hometown. For example, higher elevations can bring about sudden temperature drops or unexpected storms, even when it’s sunny and calm in the valley.
Here are a few tips for weather-checking:
- Use Reliable Sources: Don’t just rely on a quick phone app check. Look at dedicated weather websites (such as at weather.gov if you’re in the US) or apps that provide detailed forecasts for specific hiking areas.
- Understand the Forecast: Learn to read weather patterns and understand terms like ‘chance of precipitation’ or ‘wind chill factor’. This knowledge can be crucial in making informed decisions on the trail.
- Plan for the Worst: Always be prepared for unexpected weather changes. This ties back to carrying the 10 essentials—having extra clothing, rain gear, and an emergency shelter can make a huge difference.
- Be Flexible: Sometimes, the best decision is to postpone your hike. If the weather looks too risky, it’s okay to call it off and plan for another day. The mountains will always be there, but your safety is paramount.
- Watch the Sky: Once you’re on the trail, keep an eye on the weather. If you notice darkening clouds, sudden drops in temperature, or increasing winds, it might be wise to turn back or seek shelter.

6. Inform Yourself About the Local Wildlife
As a solo hiker, one of the most exhilarating aspects of any trail adventure is the chance to encounter wildlife. However, it’s super important to be informed about the types of animals you might come across, especially when you’re in their backyard without the safety of a group.
Before I set foot on any trail, I make it a point to research the wildlife in the area. This isn’t just about the thrill of potentially spotting a deer or a rare bird; it’s about understanding what to do if I encounter a bear, a snake, or even a moose.
Here’s how I approach this:
- Do Your Research: Find out what kinds of animals live in the area you’ll be hiking. This can range from small critters like snakes or murder hornets (yes that’s a thing) to larger mammals like bears or mountain lions.
- Learn About Behavior: Knowing how different animals behave and react can be crucial. For example, what should you do if you encounter a bear? The answer varies depending on whether it’s a black bear or a grizzly—read up on the specifics in our bear safety guide.
- Know Your Response: Understand the recommended actions if you encounter wildlife. Should you make noise to scare an animal away, or stay still and quiet?
- Respect Wildlife: Always remember that you’re a guest in their home. Maintain a safe distance, don’t feed wild animals, and try not to disturb them.
- Be Prepared for Insects: Sometimes, the smallest creatures can be the most challenging. Mosquitoes, ticks, and other insects can be more than just a nuisance; they can carry diseases. So, bug spray and appropriate (light-colored is best) clothing are a must.
- Stay Calm: If you do encounter a wild animal, stay calm. Panicking can escalate the situation. Remember what you’ve learned and respond accordingly.

During my hikes, I’ve had some incredible wildlife encounters that I wouldn’t trade for anything. There’s something truly special about quietly observing an animal in its natural habitat, knowing you’ve done your homework and are respecting its space.
7. Stay Aware of Your Surroundings
Staying aware of your surroundings is not just about enjoying the stunning views or spotting wildlife; it’s also about your safety. When you’re by yourself, you need to be extra vigilant, since you don’t have the added benefit of a hiking partner to help keep watch or alert you to potential dangers, or protecting you from them.
Here are some tips I follow to stay aware and safe:
- Avoid Headphones: As much as I love a good podcast or playlist, I avoid using headphones while hiking alone. It’s important to be able to hear what’s happening around you—whether it’s an animal rustling in the bushes, another hiker approaching, or the sound of a potential hazard like falling rocks.
- Trust Your Instincts: If something feels off, it probably is. Our instincts are powerful tools, especially in nature. If a particular path feels unsafe or you sense something amiss, trust that feeling and act accordingly.
- Regularly Check Your Position: Whether it’s with a GPS device, a map, or landmarks, regularly check to ensure you’re on the right path. It’s easy to get lost in thought and wander off course.
- Be Mindful of the Terrain: Watch where you step and be aware of the terrain. Loose rocks, slippery surfaces, or uneven ground can lead to falls or injuries, especially when you’re alone.
- Look and Listen for Weather Changes: As mentioned earlier, weather can change quickly. Pay attention to the sky, wind patterns, and temperature. This can give you a heads-up on when it’s time to find shelter or turn back.
- Stay Focused: It’s easy to get lost in the beauty and serenity of nature, but it’s important to maintain a level of focus on your surroundings. A momentary lapse in attention can lead to missteps or missed signs of potential danger.
Staying alert has not only kept me safe but has also enriched my hikes. I’ve noticed subtle changes in the environment, spotted wildlife I might have missed otherwise, and felt more connected to the trail.
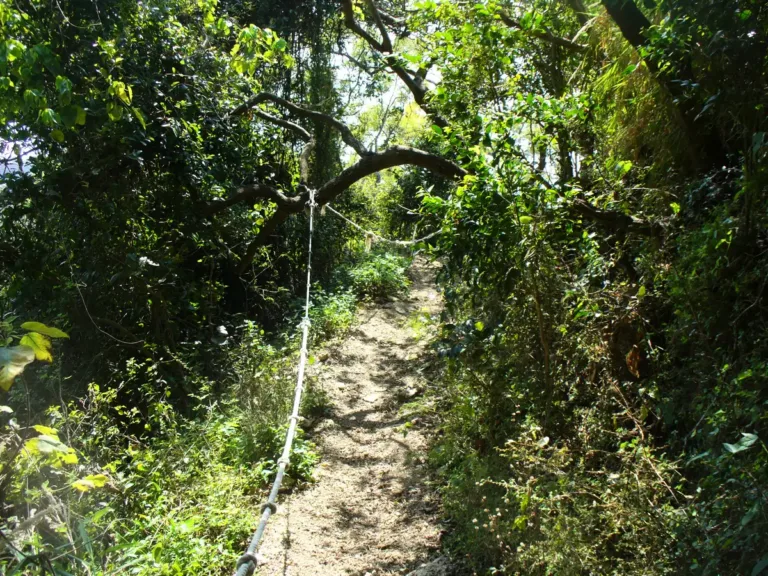
9. Stay On Trail
One of the most fundamental rules is to stay on the trail. It might sound like a no-brainer, but you’d be surprised how tempting it can be to venture off the beaten path.
Here’s why staying on the trail is so important:
- Safety: Trails are marked for a reason. They guide you through the safest, most navigable paths. When you go off-trail, you increase your risk of getting lost, encountering dangerous terrain, or harming yourself.
- Environmental Impact: Trails are also designed to minimize the impact on the environment. By sticking to the path, you’re helping to preserve the natural habitat around you. Trampling through untouched areas can damage vegetation, cause erosion, and disturb wildlife.
- Getting Lost: This is a big one. It’s incredibly easy to lose your bearings in the wilderness, even for experienced hikers. When you’re alone, the consequences of getting lost can be even more serious.
- Emergency Response: If something goes wrong and you need help, it’s much easier for rescuers to locate you if you’re on a known trail.
10. Avoid Creeps
While the vast majority of my interactions with fellow hikers have been positive and uplifting, it’s still important to address a more uncomfortable topic: dealing with creeps on the trail. It’s a sad reality that, especially as a solo female hiker, you need to be prepared for the rare but possible encounter with someone who makes you feel unsafe.
Here are some strategies I’ve developed to handle such situations:
- Trust Your Gut: If someone gives you an uneasy feeling, trust that instinct. You’re under no obligation to be polite or engage in conversation. It’s perfectly okay to keep your responses short and keep moving.
- Don’t Reveal You’re Alone: If you encounter someone who seems off, it’s wise not to let them know you’re hiking solo. I sometimes casually mention that my friend is just behind me on the trail (implying I’m fit and fast, too), or in the bushes taking a wee.
- Use Discretion at Night: In regions where I’ve felt a bit uneasy, I’ve opted to avoid drawing attention to myself at night. When there is enough ambient light that it’s safe to do so, I like to hike without a headlamp, wearing my black merino base layer. That way, I’ll notice other people long before they notice me. However, this is a tactic I use only when the risk of encountering unsavory individuals feels greater than the risk of a misstep in the dark or an attack by surprised wildlife.
- Have a Communication Plan: Carry a device like a Personal Locator Beacon (PLB) or a satellite messenger, especially in remote areas. If you feel threatened, you can use these devices to call for help.
- Learn Basic Self-Defense: It’s empowering and reassuring to know that you can physically protect yourself if necessary. Even basic self-defense techniques can make a big difference.
- Be Visible to Others: When you feel uneasy about someone, try to stay where other hikers can see you. Creeps are less likely to do anything if there are potential witnesses around.
The vast majority of people you meet will share your love for hiking and nature, and many will become part of the wonderful tapestry of your hiking memories. But never compromise on your safety and well-being. Your intuition and preparedness are powerful tools.
11. Make Sure You Can Communicate with the Outside World
In the tranquility of a solo hike, it’s easy to feel like you’re in a world entirely your own, which is part of the allure. However, ensuring you can communicate with the outside world is a critical safety measure. Here’s how I approach this:
- Carry a Charged Cell Phone: While cell service can be spotty or non-existent in remote areas, it’s still a good idea to have your phone with you. It can be useful in emergencies, especially closer to more developed areas or trailheads. In some regions, locations with good cell service are marked – take a mental note as you pass them. Also, if your connection isn’t good enough to call someone, send a text, which can often still go through.
- Consider a Personal Locator Beacon (PLB) or Satellite Messenger: For more remote hikes, I highly recommend carrying a PLB or a satellite messenger. These devices can send distress signals with your location to search and rescue services, even where there’s no cell service. PLB’s only send your location to a rescue service on the push of a button, while satellite messengers allow for two-way communication.
- Carry Extra Power: A portable power bank can be a lifesaver, literally. It allows you to recharge your phone or other communication devices, (and, ideally, your light sources) ensuring they’re ready when you need them.
- Inform Someone of Your Plans: As mentioned earlier, make sure someone knows your itinerary and when to expect you back. This way, if you’re overdue, they can alert authorities.
- Know the Area’s Emergency Protocols: Familiarize yourself with the local emergency services and how to contact them. In some places, there might be specific emergency channels or frequencies used by hikers.
I’ve thankfully never had to use a PLB, but I always carry it on remote trails. It’s a small piece of gear that provides a big sense of security, well worth the money.
12. Start Small and Progress from There
Embarking on solo hiking adventures can be incredibly rewarding, but it’s bettter to start small and gradually progress to more challenging hikes. This approach helps build your skills and confidence, ensures that you’re not biting off more than you can chew.
- Begin with Familiar Trails: Start with trails you know well. This helps you focus on the experience of hiking alone without the added challenge of navigating unfamiliar terrain.
- Gradually Increase Difficulty: As you become more comfortable hiking solo, slowly increase the difficulty of the trails. This could mean longer hikes, trails with more elevation gain, or ones with more challenging terrain.
- Develop Your Skills: Use each hike as an opportunity to hone your skills. Practice using your navigation tools, experiment with different paces, and get accustomed to managing all your gear independently.
- Build Endurance: Solo hiking often requires more physical and mental stamina than hiking with others. Gradually increase the length and duration of your hikes to build this endurance.
- Learn from Each Hike: Reflect on each hike. What went well? What could be improved? What gear were you missing, and what was just unnecessary weight? Each solo hike is a learning experience, helping you prepare for more ambitious adventures.
- Be Patient with Yourself: There’s no rush. The goal is to enjoy the journey, not just reach the destination. Be patient with your progress and celebrate the small victories along the way.
My first solo hikes were on familiar, well-traveled trails. With each hike, I pushed my boundaries a bit further, tackling more challenging terrain and longer distances. This gradual progression got me to a place where now people think I’m crazy for the journeys I complete by myself—but I’m fully confident that I can handle whatever the trail throws my way.
13. Keep Learning
The journey of a solo hiker is an ongoing learning experience. Every trail, every season, and every new adventure brings its own lessons. And, one of the best ways to quell the desire to get out onto those mountains again when you can’t is to read up on hiking skills and hone your knowledge!